Ever forget to save an Excel file, exit Excel, and then press "No" to the Save prompt? Here's what you can do to recover your file if that happens (this is for Office 2010).
Open Excel, go to File, then click on Options. Click on the Save section, and find the AutoRecover file location and copy it (this method will only work if you have the "Keep the last autosaved version if I close without saving" option checked). Open Windows Explorer, paste that in. Any autosaved versions of your file will be listed there.
On Mac:
(via http://www.dummies.com/how-to/content/recovering-autorecover-files-in-word-for-mac-2011.html )
Recovering AutoRecover Files in Word for Mac 2011
If your power goes out or your computer malfunctions when working on an Word for Mac 2011 document, all you have to do is open the application again. Word 2011 for Mac looks for and opens any AutoRecover files for the document(s) that you were working on when an unexpected crash occurred. Your document opens with “Recovered” appended to the filename. Choose File→Save As from the menu bar to restore the original filename and location.
Word for Mac can recover files that were open because, by default, Word autosaves your document every ten minutes while you’re working on it. If you want, you can change the save time interval within the AutoRecover setting as follows:
- Choose Word→Preferences→Save from the menu bar.Word’s Save preferences are displayed.
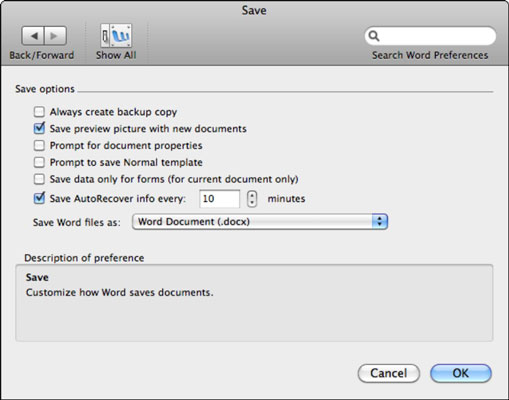
- Change the number of minutes in the Save AutoRecover Info Every: [X] Minutes setting.The default is 10 minutes. Entering a lower number saves more often, but you may notice Word is more sluggish when it saves so often. Entering a higher number may make Word perform better, but you may lose more changes if a power outage or computer crash occurs.You can deselect this check box if you don’t want Word to save an AutoRecover file. You might do this for extremely large documents that take a long time to save. Of course, if you experience a power outage or computer crash, you will lose all your changes since the last time you manually saved the file.You don’t need to select the Always Create Backup Copy check box. With AutoRecover and Time Machine, the bases are covered. The option is there only for backward compatibility.
- Click OK when you're finished.
Rarely, Word might not automatically display the AutoRecover file for the document(s) you were working on the next time you open Word. In that case, do the following in Word to open the AutoRecover file:
- Choose File→Open from the menu bar.
- Type AutoRecover or type a keyword or phrase in the Spotlight Search box in the top-right corner of the Open dialog.
- Double-click the most recently saved AutoRecover file, or select the file and click Open. If you did a keyword or phrase search, use the Last Opened information to help you choose a likely file to open.If the file you want is grayed-out, choose All Files in the Enable pop-up menu, which allows you to open any file type.
You can also use Mac OS X Time Machine to recover any file that you’ve saved at least once. When you use Word for Mac, it’s nearly impossible to lose more than a few minutes’ worth of work thanks to AutoRecover and Time Machine.